Wednesday, December 26, 2012
Raspberry Pi: Manager For iOS and Mac
A correspondent sent me this, I have not tried it but it looks interesting, especially to iOS and Mac users.
Look for the "Raspberry Pi Manager" and "Arduino Manager" links on the home page for both the iPhone/iPad and the Mac.
There are a few demo videos, too.
https://sites.google.com/site/lurvill/
Eric Pierce VA3EP - See the Disclaimer in the Introduction
© Eric Pierce and "VA3EP Amateur Radio And Other Geek Pursuits", 1952-2099. Unauthorized use and/or duplication of this material without express and written permission from this blog’s author and/or owner is strictly prohibited. Excerpts and links may be used, provided that full and clear credit is given to Eric Pierce and "VA3EP Amateur Radio And Other Geek Pursuits", with appropriate and specific direction to the original content.
Wednesday, November 28, 2012
Ham Shack: Getting my new one organized
Sorry I have not been too active on rPI and other geek pursuits. I have been reading the rPI news on this, hope to catch up soon.
By the way, if you have not set up a "google news alert" for the rPI (or anything else you like to follow) I recommend you do it. Will mail you a nice summary of the top news on the net from everywhere once a day (or whatever). Very easy, see http://www.google.ca/alerts
Now that the major work is done on my basement finishing project, have been doing outside winterization work around the house. Spent the last 2 weeks cleaning out the garage (had not really done a total cleanout for 7 years :-) and a MAJOR dump run is coming up next Sat.
I did get everything settled in the into the new shack (aka geek pit), see pictures at the top.
I have an FM rig hooked up and checked into the club Bay Bridge Net last week.
Now I am sorting out the shack walk in closet with 3 wrap around shelves that is JAMMED with stuff I have been collecting for years. My wife VA3JOC and I made a rule (she is doing the same for her office closet) that anything that we can't name a specific planned use for, we have to toss. Very liberating (but sometimes painful!)
Eric Pierce VA3EP - See the Disclaimer in the Introduction
© Eric Pierce and "VA3EP Amateur Radio And Other Geek Pursuits", 1952-2099. Unauthorized use and/or duplication of this material without express and written permission from this blog’s author and/or owner is strictly prohibited. Excerpts and links may be used, provided that full and clear credit is given to Eric Pierce and "VA3EP Amateur Radio And Other Geek Pursuits", with appropriate and specific direction to the original content.
Wednesday, October 31, 2012
Software: Windows 8 works for me (so far)
I upgraded 2 home computers to Win 8 on the weekend.
One was my "main" homer laptop, and the other was my wife Jo's (VA3JOC) daughter's (she was visiting on the weekend). The interesting thing is that when she saw mine, she thought it looked "very cool" and just had to have it. I spend a few minutes showing her how to use it, and she loved it.
I did not find ANYTHING that I could not do (but note I have not tried a lot of ham sw yet). A couple of things I had to do a quick google for, but no problem. The new interface takes a few minutes to get used to, but I like it. The integration of old and new UI is a little weired, but that seems to be the only way that they could provide and environment to run old apps (all I have tried so far do). The switching back and forth is clean, and both old and new apps can be active at a time.
The online install and keep your data option worked fine for me (but I did have a data backup just in case :-)
IMHO bottom line is that kids/teens/young adults are going to love it (especially on a tablet), as will any "geeks" that love change. People who do not adapt well to change (i.e. don't like it when there cutlery is on the wrong side of the plate) will hate it.
If you bought (or buy) a new computer between June 2, 2012 and January 31, 2013 you can upgrade online for $14.99 US at
http://windows.microsoft.com/en-CA/windows/upgrade-offer
If you have an older computer you can upgrade for $39.99 US (for now) at
http://windows.microsoft.com/en-US/windows/buy
p.s. have not been too active here later, but my basement finishing project is now 99% complete (just like they say in SW projects :-) All the furniture is in place in all the rooms, stuff stored away in closets and shelves (but needs some re-organizing). Just have to put up the projector in screen in the "home theater", install some taps and do some caulking in the bathroom. I am now starting to get the new shack sorted out and everything hooked back up. Should be back to some serious hamming and hacking soon!
Eric Pierce VA3EP - See the Disclaimer in the Introduction
© Eric Pierce and "VA3EP Amateur Radio And Other Geek Pursuits", 1952-2099. Unauthorized use and/or duplication of this material without express and written permission from this blog’s author and/or owner is strictly prohibited. Excerpts and links may be used, provided that full and clear credit is given to Eric Pierce and "VA3EP Amateur Radio And Other Geek Pursuits", with appropriate and specific direction to the original content.
Saturday, October 6, 2012
Raspberry Pi - GPIO buffer and Webserver Questions
Doug emailed me with some questions:
> These days, embedded control generally means a web page for monitoring and controlling the device.
Well, IMHO the rPI makes this VERY easy, see
http://ve3epp.blogspot.ca/2012/08/raspberry-pi-display-time-on-rpi-web.html
> Need a small board that has a header that plugs directly into the rPi header
Check out this:
http://adafruit.com/products/914
This was mentioned in
http://ve3epp.blogspot.ca/2012/08/raspberry-pi-home-brew-breadboard.html
> ... buffers for the GPIO lines -- not sure how to address direction.
IMHO Easiest to dedicate lines for out and in. Take a look at this:
http://ve3epp.blogspot.ca/2012/08/raspberry-pi-safely-interfacing-to-gpio.html (first part)
http://ve3epp.blogspot.ca/2012/08/raspberry-pi-why-74hc14n.html
I bought 10 74HC14N off eBay from a cdn supplier for $0.50 each. Looks like he still has some:
http://www.ebay.ca/itm/Lot-2-74HC14N-Hex-Inverter-Schmitt-Trigger-Inputs-7414-QTY-2-/110787294662?pt=LH_DefaultDomain_2&hash=item19cb6ff5c6
> I am thinking seriously of included a dedicated Rs232 interface -- I am a
> big fan of using RS232 for automation interfaciing ( it is reasonable
> robust, and you can always go debugging without a lot of special equipment
Yes, I like good old RS232. If you don't need the full +/-12 volt swing, you can just do a 3.3 to 5 v ttl conversion. See above. Also see:
http://ve3epp.blogspot.ca/2012/08/raspberry-pi-more-about-serial-33v-ttl.html
> I am also interested in 1-wire interface.
Have not done much with this yet, but a lot of people have, see here
You may get the idea that reading some of my old blog posts MAY be useful :-)
Eric Pierce VA3EP - See the Disclaimer in the Introduction
© Eric Pierce and "VA3EP Amateur Radio And Other Geek Pursuits", 1952-2099. Unauthorized use and/or duplication of this material without express and written permission from this blog’s author and/or owner is strictly prohibited. Excerpts and links may be used, provided that full and clear credit is given to Eric Pierce and "VA3EP Amateur Radio And Other Geek Pursuits", with appropriate and specific direction to the original content.
Monday, September 24, 2012
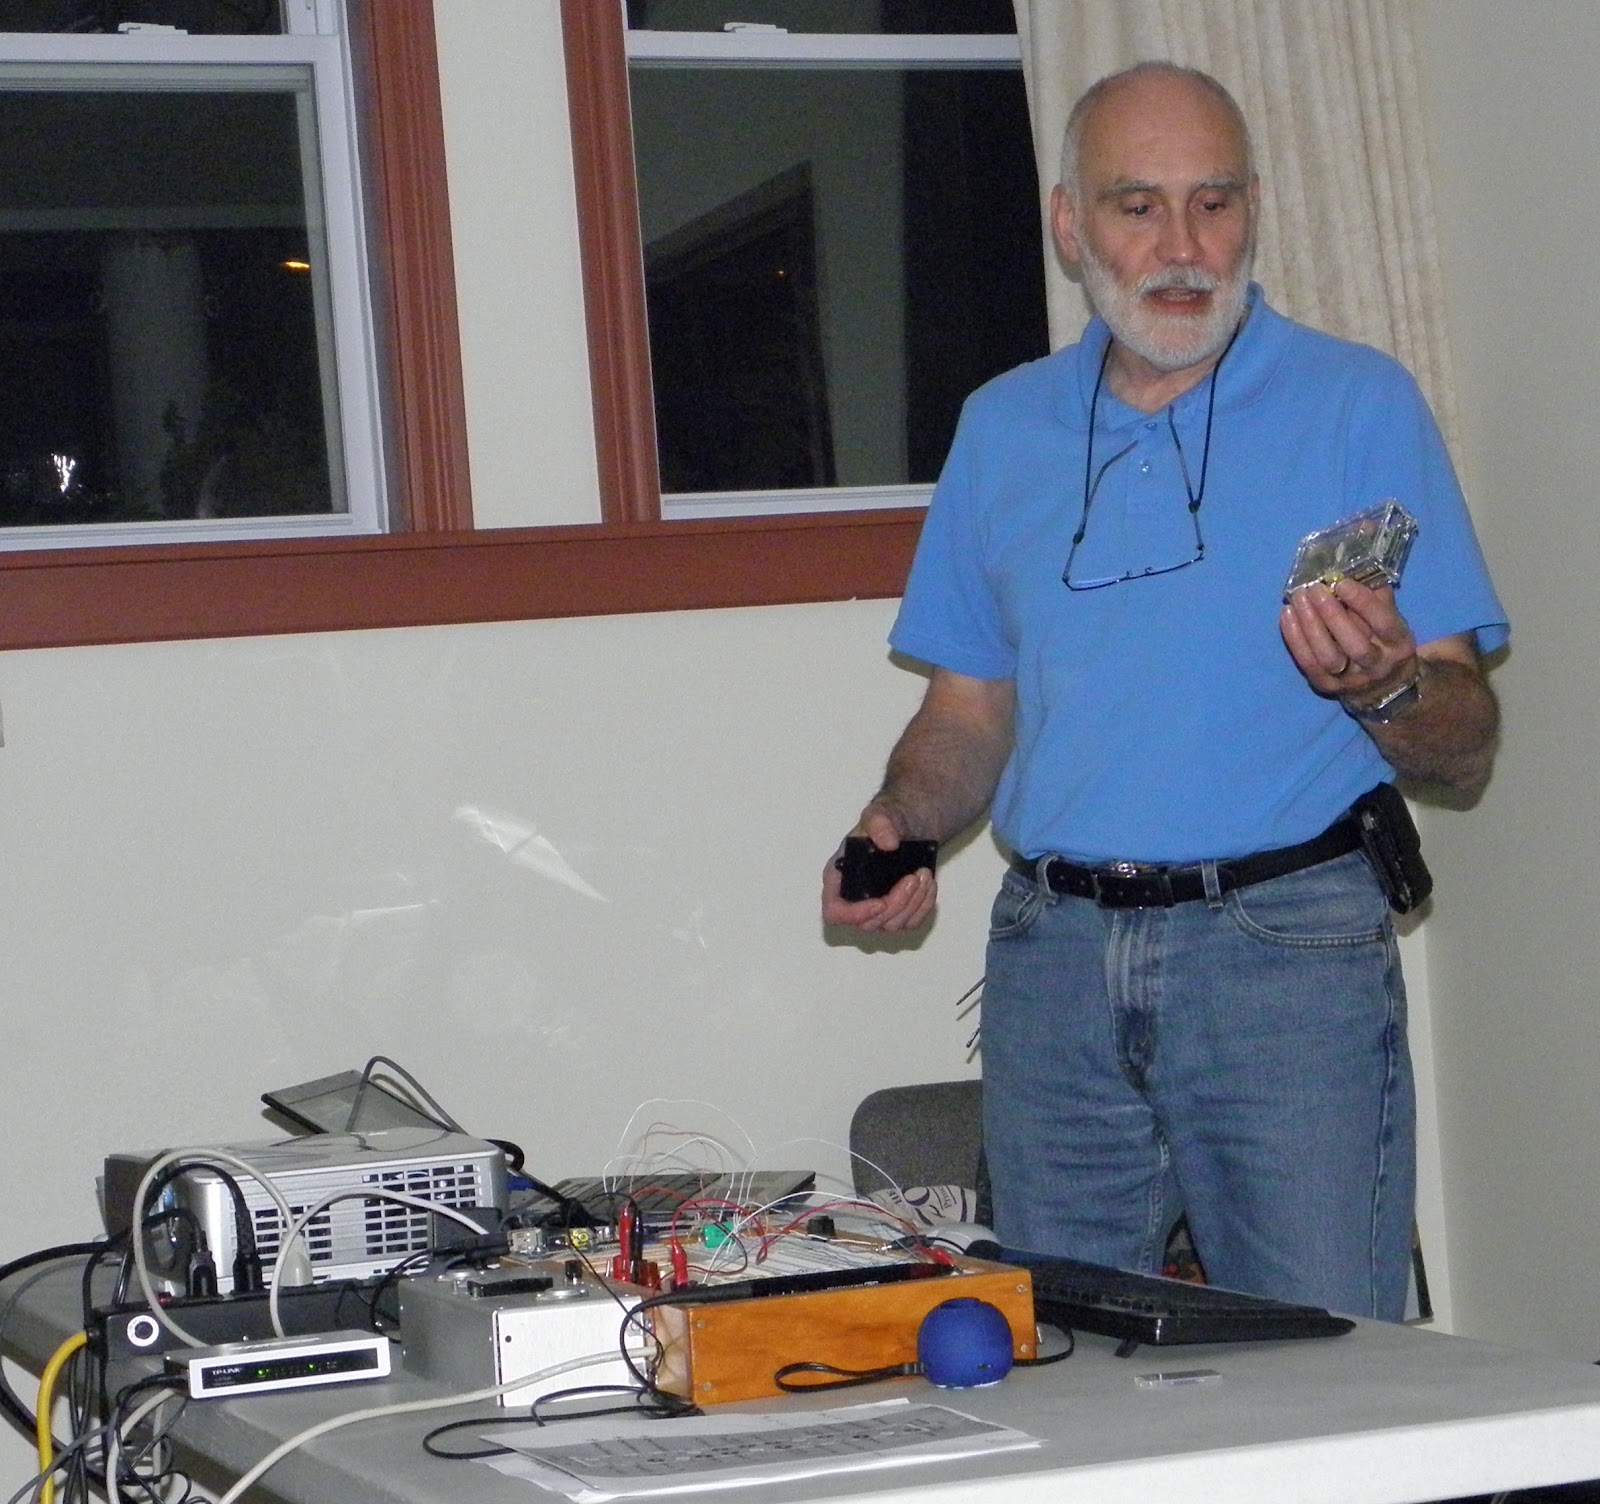
Raspbery PI - Presentation to Amateur Radio Clubs
On Wednesday May 15, 2013 I presented an updated version of the Raspberry Pi presentation to the Quinte Amateur Radio Club (QARC). You can view or download a PDF of the presentation from here.
You can buy one over the counter from Qkits in Kingston, or mail order from Element 14 (make sure you select country Canada, it then ships customs cleared).
To get started, see here for the hardware and sw setup, and here for more details on the OS. The official Raspberry PI site, wiki, forum are the place to start as things are moving fast, and information gets out of date fast.
I also have a number of blog posts on things I have done with it (some of which may actually be outdated, as new and better ways to do things are emerging all the time)
A number of the PERC and QARC members have purchased rPIs and we have started a SIG mailing list. Contact me at va3ep@rac.ca if you want to be on the list.
On Wednesday October 4, 2012 I repeated this presentation at the meeting of the Kingston Amateur Radio Club where there was also a lot of interest.
On Thursday September 20, 2012 I made a presentation and demonstration of the Raspberry PI to the Prince Edward Amateur Radio Club.
Eric Pierce VA3EP - See the Disclaimer in the Introduction
© Eric Pierce and "VA3EP Amateur Radio And Other Geek Pursuits", 1952-2099. Unauthorized use and/or duplication of this material without express and written permission from this blog’s author and/or owner is strictly prohibited. Excerpts and links may be used, provided that full and clear credit is given to Eric Pierce and "VA3EP Amateur Radio And Other Geek Pursuits", with appropriate and specific direction to the original content.
Sunday, September 23, 2012
Raspberry PI - how to find out IP address
A reader writes:
> How do I determine the IP address of my Pi?
In a shell type:
$ ifconfig
If you type
$ apropos something
it will list all applicable commands, i.e.
$ apropos network
it would have listed ifconfig (but it might not have been obvious that
ifconfig with no argument will display the current network interface
conditions without changing anything). For detail on any command
$ man ifconfig
will display the manual page.
Eric Pierce VA3EP - See the Disclaimer in the Introduction
© Eric Pierce and "VA3EP Amateur Radio And Other Geek Pursuits", 1952-2099. Unauthorized use and/or duplication of this material without express and written permission from this blog’s author and/or owner is strictly prohibited. Excerpts and links may be used, provided that full and clear credit is given to Eric Pierce and "VA3EP Amateur Radio And Other Geek Pursuits", with appropriate and specific direction to the original content.
Wednesday, September 19, 2012
Raspberry PI - now supports OVERCLOCKING
If you are not checking out the Raspberry Pi main website, you miss out on cool stuff like this:
Eric Pierce VA3EP - See the Disclaimer in the Introduction
© Eric Pierce and "VA3EP Amateur Radio And Other Geek Pursuits", 1952-2099. Unauthorized use and/or duplication of this material without express and written permission from this blog’s author and/or owner is strictly prohibited. Excerpts and links may be used, provided that full and clear credit is given to Eric Pierce and "VA3EP Amateur Radio And Other Geek Pursuits", with appropriate and specific direction to the original content.
Tuesday, September 18, 2012
Raspberry PI - Lots of ways to interface to the GPIO pins
By installing the appropriate LINUX drivers and Software Modules (more on this in a later post, I hope), the rPI can communicate on the General Purpose I/O Pins (GPIO) with a LOT of different protocols.
At least one rPI LINUX disto from Adafruit has support for SPI, I2C, and one wire already built in.
Just be aware that the rPI GPIO pins are 3v3 level, and not buffered, so you have to be careful in interfacing to them, see this post for more information.
Parallel (on rPI 3v3)
http://en.wikipedia.org/wiki/Parallel_communications
up to 17 wires + Gnd
up to Mhz
Many devices (LEDs, switches)
Serial Asynchronous - Start/8 Bit/Stop (on the rPI, level is 3v3, not RS-232 level
http://en.wikipedia.org/wiki/RS-232
2 wires + Gnd (or more)
115,200 bit/s and above
Many devices (especially legacy)
1-Wire (on rPI 3v3)
http://en.wikipedia.org/wiki/One_wire
1 Wire + Gnd
up to 16.3 kbit/s
Devices
Memory
Thermometers
Clock / Timer
Digital Potentiometer
etc.
I2C (on rPI 3v3)
http://en.wikipedia.org/wiki/I2c
2 Wires + Gnd
Serial Data Line (SDA), Serial Clock (SCL)
Up to 5 MHz
Devices
SPD EEPROMs on SDRAM, DDR SDRAM, DDR2 SDRAM, NVRAM
DACs and ADCs.
intelligent speakers.
OLED/LCD displays
hardware monitors and diagnostic sensors
real-time clocks
etc.
SPI - Serial Peripheral Interface Bus (on rPI 3v3
http://en.wikipedia.org/wiki/Serial_Peripheral_Interface_Bus
4 wires + Gnd
SCLK: serial clock (output from master);
MOSI; SIMO: master output, slave input (output from master);
MISO; SOMI: master input, slave output (output from slave);
SS: slave select (active low, output from master).
Not limited to any maximum clock speed, typical 1–100 MHz
Devices
Sensors: temperature, pressure, ADC, touchscreens, video game controllers
Control devices: audio codecs, digital potentiometers, DAC
Camera lenses: Canon EF lens mount
Communications chips: Ethernet, USB, USART, CAN, IEEE 802.15.4, IEEE 802.11
Memory: flash and EEPROM
Real-time clocks
LCD displays, sometimes even for managing image data
etc.
Eric Pierce VA3EP - See the Disclaimer in the Introduction
© Eric Pierce and "VA3EP Amateur Radio And Other Geek Pursuits", 1952-2099. Unauthorized use and/or duplication of this material without express and written permission from this blog’s author and/or owner is strictly prohibited. Excerpts and links may be used, provided that full and clear credit is given to Eric Pierce and "VA3EP Amateur Radio And Other Geek Pursuits", with appropriate and specific direction to the original content.
Saturday, September 15, 2012
Raspberry PI - Keeping Rasbian Up To Date
Updated Sep 18, 2012
I enjoy reading posts in the Raspberry PI Forum. There is always something there that is interesting, and a lot of useful tips.
In This Post was a tip to keep your Rasbian LINUX up to date with latest patches as "as fixes are added every week (even daily)".
Assuming that your rPI is connected to the Internet, as the command prompt, type
sudo apt-get update
sudo apt-get upgrade
sudo reboot
and you will have all the latest updates. I did this a few weeks ago, but when I just did it I have 127 packages updated. So it looked like you need to do this regularly. There may be a way to do this automatically, but for this type of device, IMHO that would not make sense.
As reader Dave noted, this can take a LONG time, so do the upgrade when you don't want to do anything else for a while.
Also, during the upgrade there is a prompt about the file /etc/skel/.bashrc being modified (that is a file used to create individual login scripts for each account that gets created - kind of an account level AUTOEXEC.BAT). As I did not modigy it, then I assume it was one of the packages that I installed that did. The "right" thing would be to make a backup (in another term session, for example) and then after the upgrade to compare the new and old and merge the changes. May just be easier to re-install any package that breaks.
LINUX gurus know this stuff already, but this is a good tip for the LINUX newbie. See this reference for more info on the Debian apt command.
Eric Pierce VA3EP - See the Disclaimer in the Introduction
© Eric Pierce and "VA3EP Amateur Radio And Other Geek Pursuits", 1952-2099. Unauthorized use and/or duplication of this material without express and written permission from this blog’s author and/or owner is strictly prohibited. Excerpts and links may be used, provided that full and clear credit is given to Eric Pierce and "VA3EP Amateur Radio And Other Geek Pursuits", with appropriate and specific direction to the original content.
Wednesday, September 12, 2012
Raspberry PI - Python 2 and 3 - Print, Serial, GPIO
As a Python newbie, I am stumbling upon things about it as I go along.
One of the things that I have discovered is that in Python 2, you can import the serial function that is used in Python 3 using the following:
then you can use the Python 3 print function in Python 2 programs
From what I am reading (I am a real Python newbie) for the beginning programmer the biggest difference between 2 and 3 is the the way print works - in 2 it is a statement, in 3 it is a function.
Also, it looks like you can install the important Serial and GPIO support modules to work under Python 2 or 3. I assume that the module install routine detects what version it is being installed for and does the "right thing".
For Serial see: http://pyserial.sourceforge.net/pyserial.html
For GPIO see: http://code.google.com/p/raspberry-gpio-python/downloads/list
I have not really experimented with this yet, but it would mean that you should be able to do most common programming using Python 3, which from what I am reading, is the preferred version to use.
Apparently the only real reason to use 2 is if there is some module you absolutely need that just does not work in 3 (yet).
Eric Pierce VA3EP - See the Disclaimer in the Introduction
© Eric Pierce and "VA3EP Amateur Radio And Other Geek Pursuits", 1952-2099. Unauthorized use and/or duplication of this material without express and written permission from this blog’s author and/or owner is strictly prohibited. Excerpts and links may be used, provided that full and clear credit is given to Eric Pierce and "VA3EP Amateur Radio And Other Geek Pursuits", with appropriate and specific direction to the original content.
One of the things that I have discovered is that in Python 2, you can import the serial function that is used in Python 3 using the following:
from __future__ import print_function
then you can use the Python 3 print function in Python 2 programs
print(*args, sep=' ', end='\n', file=None)
From what I am reading (I am a real Python newbie) for the beginning programmer the biggest difference between 2 and 3 is the the way print works - in 2 it is a statement, in 3 it is a function.
Also, it looks like you can install the important Serial and GPIO support modules to work under Python 2 or 3. I assume that the module install routine detects what version it is being installed for and does the "right thing".
For Serial see: http://pyserial.sourceforge.net/pyserial.html
For GPIO see: http://code.google.com/p/raspberry-gpio-python/downloads/list
I have not really experimented with this yet, but it would mean that you should be able to do most common programming using Python 3, which from what I am reading, is the preferred version to use.
Apparently the only real reason to use 2 is if there is some module you absolutely need that just does not work in 3 (yet).
Eric Pierce VA3EP - See the Disclaimer in the Introduction
© Eric Pierce and "VA3EP Amateur Radio And Other Geek Pursuits", 1952-2099. Unauthorized use and/or duplication of this material without express and written permission from this blog’s author and/or owner is strictly prohibited. Excerpts and links may be used, provided that full and clear credit is given to Eric Pierce and "VA3EP Amateur Radio And Other Geek Pursuits", with appropriate and specific direction to the original content.
Thursday, September 6, 2012
Raspberry PI - New Board Revision / Make in UK
Interesting news at http://www.raspberrypi.org/
1) A New "Revision 2" board, with some subtle and not so subtle changes is now in production. Most notable changes:
- Mouting holes
- More power to the USB ports
- Change to GPIO pin mapping (apparently will make sw development a bit more challenging to work for all rev boards)
Also some other things, see the link above for details.
2) The board will now also be made in the UK (as well as still in China, I assume)
Again, more info on the link above.
Eric Pierce VA3EP - See the Disclaimer in the Introduction
© Eric Pierce and "VA3EP Amateur Radio And Other Geek Pursuits", 1952-2099. Unauthorized use and/or duplication of this material without express and written permission from this blog’s author and/or owner is strictly prohibited. Excerpts and links may be used, provided that full and clear credit is given to Eric Pierce and "VA3EP Amateur Radio And Other Geek Pursuits", with appropriate and specific direction to the original content.
Saturday, September 1, 2012
Raspberry PI - another "free" option for connecting to GPIO Pins
I just received a Pi Cobbler Breakout Kit for Raspberry Pi from Adafruit.
It looks great for connecting the GPIO Pins to a proto board while minimizing the likelyhood of shorts.
By the way, check out their site as they not only have a lot of Raspberry PI stuff, they have TONS of other interesting products.
After I had order the "Cobbler" I thought of something else that might be useful for connecting to the rPI GPIO header and require no soldering / heat shrinking like what I suggested here.
If you see an old computer being "recycled" (more joy of junk), open the case and look for the wires that go from the front panel switches and leds and plug into the motherboard. You can see them hanging there in this picture. You can just cut them away from the front panel with side cutters, leaving the wires as long as you can. On the end that plugs into the motherboard, just pull them off, you will find these connectors will fit the rPI GPIO header pins exaclty.
Although most of the connectors are double, and would cover 2 pins at once, that is not a problem (even if you only need access to one GPIO pin). Just strip the insulation off of the end without a connector, twist tightly and insert into the propo board. Tinning the end with your soldering iron will keep it from fraying, just make sure that you use the solder sparingly and knock off any excess while still melted so as not to make the wire to fat to push into the proto board.
Eric Pierce VA3EP - See the Disclaimer in the Introduction
© Eric Pierce and "VA3EP Amateur Radio And Other Geek Pursuits", 1952-2099. Unauthorized use and/or duplication of this material without express and written permission from this blog’s author and/or owner is strictly prohibited. Excerpts and links may be used, provided that full and clear credit is given to Eric Pierce and "VA3EP Amateur Radio And Other Geek Pursuits", with appropriate and specific direction to the original content
Thursday, August 30, 2012
Raspberry PI - Suitable for Real Time?
I used to to a lot of true "real time" programming, in Assembler and FOTRAN on PDP-11's, then 6800/6809's and more recently on the PIC in "C" ("WalkMorse" project - not yet published).
From Wikipedia:
"Real-time programs must guarantee response within strict time constraints ... a non-real-time system is one that cannot guarantee a response time in any situation, even if a fast response is the usual result."
This site states
"Note that this module (class to control the GPIO) is unsuitable for real-time or timing critical applications. This is because you can not predict when Python will be busy garbage collecting. It also runs under the Linux kernel which is not suitable for real time applications - it is multitasking O/S and another process may be given priority over the CPU, causing jitter in your program."
So the bottom line is, if you are controlling something that is VERY critical as to timing, the rPI with Raspbian + Python is not the ticket. I would have to do some testing, but IMHO I am sure you would get guaranteed 1 second response at least (maybe with some jitter), probably down to 100 ms (maybe less) without too much issue.
However if you want real guaranteed response, you would need to use a suitable chip such as PIC, ARM, etc. programmed in assembler or C on the bare metal, or a true Real Time OS.
There seems to be some buzz about putting a real time OS on the rPI, but I am not aware of any yet.
References
http://en.wikipedia.org/wiki/Real-time_computing
http://code.google.com/p/raspberry-gpio-python/
http://en.wikipedia.org/wiki/Real-time_operating_system#Examples
http://www.raspberrypi.org/phpBB3/viewtopic.php?f=9&t=5300
Eric Pierce VA3EP - See the Disclaimer in the Introduction
© Eric Pierce and "VA3EP Amateur Radio And Other Geek Pursuits", 1952-2099. Unauthorized use and/or duplication of this material without express and written permission from this blog’s author and/or owner is strictly prohibited. Excerpts and links may be used, provided that full and clear credit is given to Eric Pierce and "VA3EP Amateur Radio And Other Geek Pursuits", with appropriate and specific direction to the original content.
Wednesday, August 29, 2012
Raspberry PI - Home Brew Breadboard
I thought I would make a few notes about the Breadboard that I am using to experiment with hardware and software for my rPI, as it might give some newbies out there some ideas.
Building electronic breadboards is something I have been doing since grade 6 or 7 (in the 60's!) and I find that it is very important to help you build reliable and repeatable prototypes and keep from blowing things up.
If you are trying to experiment with hardware on a table or workbench, you need something plug components into and to hold everything stable. You could use alligator leads and loose stuff laying all over, but if you accidentally yank on a wire it will short or disconnect something, in the worst case blowing up your rPI.
Photo 1

In Photo 1 above, you can see the overall layout. The DVI computer monitor, USB keyboard and USB mouse are on the left. The square frame with really old style plugboard (that used to use very large old components on little frames) came from an old electronics lab in a school that was being thrown out (lab was probably being turned into a "new media room" or something).
Onto the old plugboard I bolted on an assortment of new style solderless Breadboard / Proto Board units for inserting leaded parts and DIP ICs to build up circuits. A couple of them have been with me so long they are turning yellow! You can get these at any good hobby / electronic supplier.
An old analog open frame power supply that I scrounged from some equipment that was being thrown out by the same school is bolted to the back. It supplies +5 volts at up to 4 amps (see my posting about using a good beefy power supply), and +12 and -12 at 1 amp. It has a power cord that plugs into the 120 volt wall socket, with the green safety ground tied to the metal frame. There is a hole drilled in the wood to run the power wired underneath. Wiring is very simple, if someone wants a schematic let me know.
Photo 2

In photo 2 you can see how I have the rPI bolted to the side so that the monitor, keyboard, mouse and power cables do not move it around. There is a wooden spacer under the inside corner, some insulating foam (just in case, not metal there) and some rubber washers I dug out of my "junk box" to keep trom shorting or damaging the board. The MINI USB power cable goes through a hole on the side under the board.
Photo 3

In photo 3 you can see the SPST power switch for the Mini USB going to the Raspberry Pi. This allows me to quickly switch off the rPI without switching off the power supply. Since the PS is analog, it takes a while for the big capacitors in to discharge, and it will run the rPI for quite a few seconds when the plug is pulled out of the wall.
The other switch is a 4 Pole ST switch that allows me to switch off the -12 / +5 / +5 / +12 binding posts with one click, this will be used to power circuitry on the proto boards with jumper wires attached to the binding posts.
You can get toggle switches and binding posts from any good supplier.
Photo 4

The last photo shows 5 biding posts that have no connection to anything under the board. What I use these for is for connecting test leads from test equipment such as a DVM, Oscilloscope, etc. The leads to them are usually quite heavy, and have relatively thick ends for probing around. I use a banana to banana (or BNC or whatever) lead to connect the equipment, then use a thin long jumper wire to connect to the point in the circuit to be probed. Much less likely to pull something out in the circuit that way.
There is no need to pay someone to cut and strip jumper wires to plug into the proto board, just go dumpster diving and find some pieces of CAT5 solid network cable from an office renovation. Then cut into lengths, strip off the outer sheath, untwist the wires and strip the ends for jumpers.
To make up the jumpers to plug on the rPI GPIO header, I cut apart an old female DB-25 connector from an old cable (you can find these in good dumpsters everywhere) to get the pins out (hard hacking, but doable if you take care). Then I soldered a jumper cable to an individual pin, covered it in heatshrink, and it's done. You can buy assembled wires with ends, or a fancier breakout cable like this from Adafruit.
I think you will find the time invested in buying a breadboard complete or making one from purchased and scrounged components is well worth the time. It will save you countless hours when your "ratnest" lashup of wires and alligator clips starts to act flaky, or the cat catches a cable and pulls it onto the floor.
Eric Pierce VA3EP - See the Disclaimer in the Introduction
© Eric Pierce and "VA3EP Amateur Radio And Other Geek Pursuits", 1952-2099. Unauthorized use and/or duplication of this material without express and written permission from this blog’s author and/or owner is strictly prohibited. Excerpts and links may be used, provided that full and clear credit is given to Eric Pierce and "VA3EP Amateur Radio And Other Geek Pursuits", with appropriate and specific direction to the original content.
Subscribe to:
Posts (Atom)